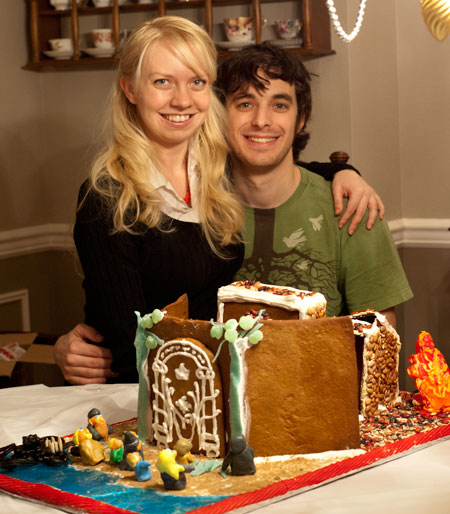
Eric and I are shocked, thrilled and honored to have won the 2010 Johnson Family Gingerbread Competition! It was a close race and we really thought we’d be giving up our title to someone else. Make sure you check out the original 2010 competition post if you haven’t yet, it gives great details on each gingerbread creation.
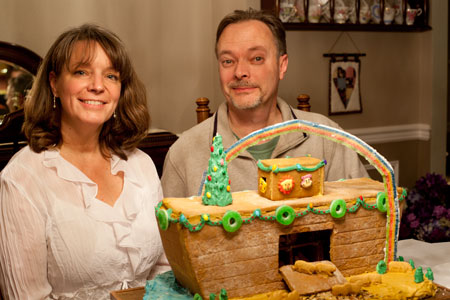
We really thought Eric’s parents would take first this year with their adorable Noah’s Ark. The rainbow was seriously a stroke of genius! The first day of voting they pulled ahead quickly. I think we just ended up getting the nerd votes in the end!

Heather and her husband John surpassed their goal. After last year’s competition (in which they earned 3 votes) they set a goal of 4 votes for this year. Instead they got 15, 5 times what last year’s creation earned them! Way to go! We were all pretty impressed with their creativity.
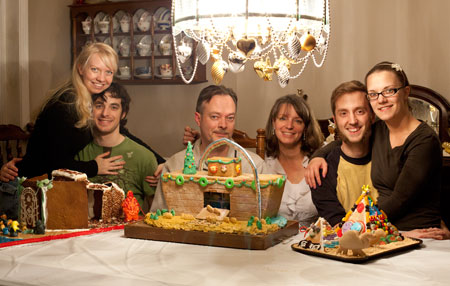
This is such a fun family tradition, it’s so exciting to see what everyone comes up with each year. It’s also neat that the first year of the competition Heather and John were dating, the second year they were engaged, and now they’re married. It’s fun to look at the past years’ posts and see the milestones in their awesome relationship. Thanks to all of you for voting and helping us determine the winner. It makes the event even more fun.
In case any of you are hoping to build a LOTR Mines of Moria Gingerbred House (because who wouldn’t hope to build one?) or just want some tips on getting creative with candy and gingerbread, here’s some instructions on how we made our AWARD WINNING gingerbread house 😉

The first key to an awesome gingerbread house (which is not necessarily a literal house) is the gingerbread. If you really want to get creative, skip the kit. Yes you can get a somewhat affordable gingerbread kit, but doing so will really limit your creativity, and it is actually cheaper to make your own. I love any recipe with lots of molasses and ginger, so any gingerbread I make always has lots of both.
This year I used the gingerbread cookie recipe that I made last Christmas. I mentioned last year that I would use this for cookies but not gingerbread houses. Let me amend that statement! I needed to bake a bunch of cookies for various parties so decided I’d just make a lot of batches of my gingerbread dough. It worked great for the gingerbread house, I just baked my pieces a little longer to get them extra crispy. I also discovered that if you skip the butter…ahem…forget your melted butter in the microwave, and make the gingerbread cookies without it you get a VERY hard cookie that’s perfect for a gingerbread house you’re not planning to eat. That will be my recipe for next year!
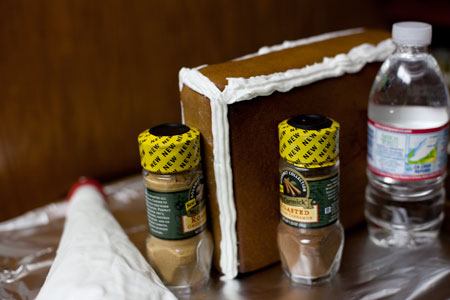
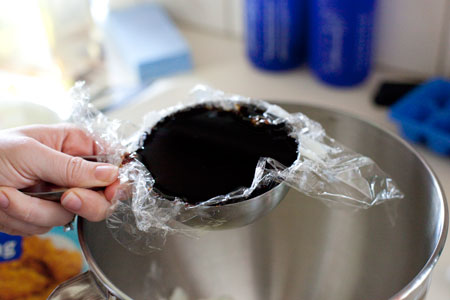
When making gingerbread, or anything that requires measuring something very messy like shortening or molasses, here’s a trick Eric taught me that he learned from his mother. Simply cover the inside of your measuring cup with saran wrap. I LOVE this tip because it mean I can use the same cup for all my ingredients without having to wash and dry it in between. Once you pour all the molasses out that you can, just fold the plastic wrap in half and squeeze the excess out into your bowl.
I used my cream of tartar royal icing recipe and did all the structural work in the couple days leading up to the competition. That way everything was really firm when we started decorating. When gluing pieces together, I use anything I can find in the kitchen to support the pieces while they dry. A foil covered cutting board makes a great drying base so you don’t have to scrape frosting cement off of your counters.
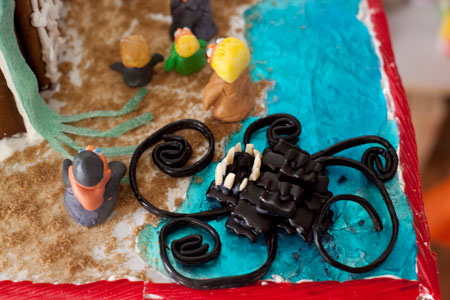
Making the Watcher in the Water was the most fun for me. I originally planned to make him in fondant like the Fellowship, but I couldn’t dye it dark enough. Then we went to Top Foods and spotted the licorice wheels and gummi bears in their bulk candy section. I knew that somehow I could turn those into a tentacled monster! I dyed some frosting black to hold the pieces together. Before gluing I built one layer at a time on the counter, then copied that layer gluing as I went. The teeth are just sliced almonds, an idea I got from my Halloween monster mouths.
We melted Jolly Ranchers our first year for the stained glass windows in our gingerbread chapel. This year we used the same technique to make the water for our monster to jump out of. Melting Jolly Ranchers is really simple. Just cover a cookie sheet with foil, then place your Jolly Ranchers on it. If you want a solid color you can leave the Jolly Ranchers whole, for a stained glass look crush them into smaller pieces and mix together. Bake them for six minutes in 350 degree oven. Once it’s melted you can use a knife to spread it to fill in any holes or smooth your edges. You can use a blow dryer on high to repair any cracks once the candy cools and hardens. When you’re happy with it you can peel the foil off the candy or leave it on to reflect more light back through the “glass”. For sand, just spread some frosting on your base and press brown sugar into it while the frosting is still wet.
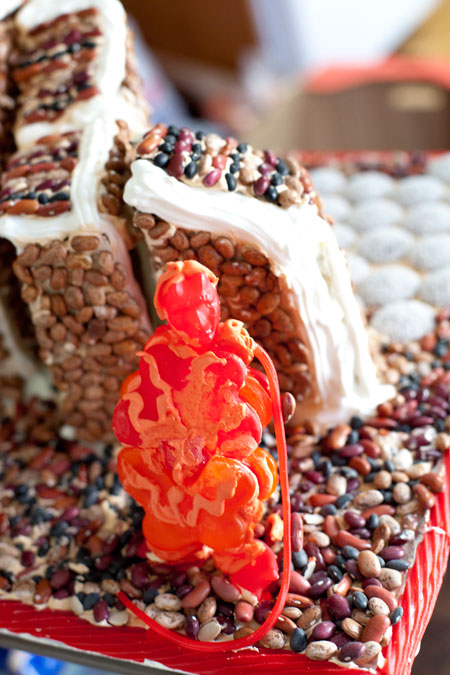
The Balrog was also made of various gummi candies. We used red devil faces that appeared to be left over from Halloween for his head and feet. Then we used giant gummi bears and gummi butterflies for his body and a pulled apart Twizzler for his whip. I drew orange frosting flames on him but they got a little messed up when he fell over. Anyway, I think he’s rather fearsome!
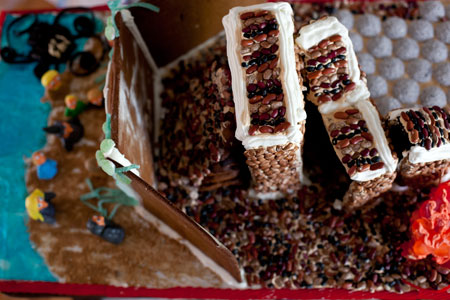
We had to decide between going Christmasy, or keeping things a little more authentic and natural. After deciding on authenticity, we knew we needed something rocky for the inside of our mines. Originally we were thinking of using those chocolate pebble candies, but they were $7.99/lb! Then I spotted the chili beans for only $1.99/lb and knew they’d be perfect. Eric worked hard on placing each and every bean while I created our cast of characters.
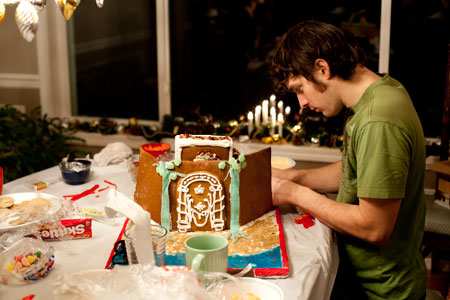
Each year I try to learn something new with the gingerbread house, this year it was fondant. Honestly, we think fondant tastes terrible and refused to have it on our wedding cake, but it’s really fun for sculpting if you’re not too worried about eating it. I found a recipe for marshmallow fondant that worked GREAT. I can’t stress enough how important it is to grease your hands with Crisco while you’re working with this stuff. It will save you major mess and frustration!
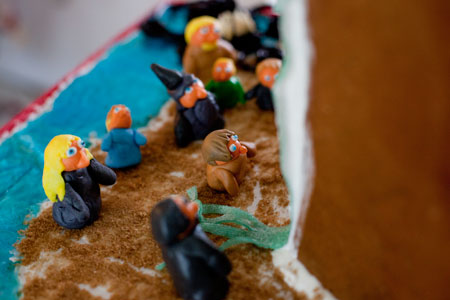
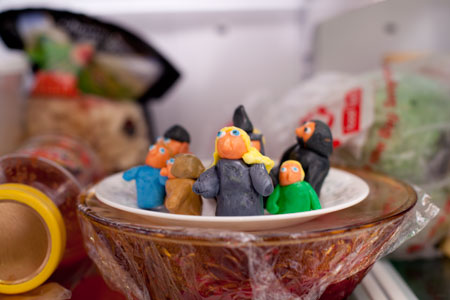
In my mind the Lord of the Rings characters would look a lot more realistic, but my sculpting abilities and time limit were rather restricting. They still came out adorable at least! After I made each character they went on a plate in the fridge because the house was so warm they would start to droop and fall over. I did find that wrapping the fondant for their bodies around a large gummi bear really helped give them stability to actually stand up. We call the image below the Fellowship of the Fridge.
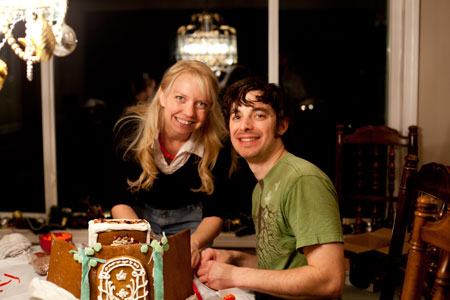
In the midst of the stress and difficulty of the past few weeks, this was such a fun break and a great activity for family bonding. We think we already know what we want to do next year!
Here’s the marshmallow fondant I made for our little Fellowship. Marshmallow fondant is the best tasting kind, although I’m still not a huge fan of eating it. Make sure to get the mini marshmallow, they work better than the big ones.
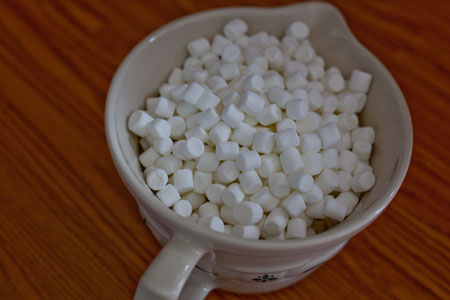
I used a Longaberger mixing bowl my mom gave me to melt the marshmallows. I love it’s handle and pour spout, but any microwave safe bowl will do just fine. If you want to color your fondant like I did, wait until you’re ready to shape it to avoid the colors changing or bleeding while being stored in the fridge.

Marshmallow Fondant
Ingredients
16 oz white mini-marshmallows (I recommend Kraft)
2 to 5 TBS water
2 lbs powdered sugar (I use C & H)
1/2 cup Crisco (in a bowl)
Instructions
Melt marshmallows and 2 tablespoons of water in a microwave stirring every 30 seconds until melted. It took me about 2 1/2 minutes.
Place half of the powdered sugar on the top of the melted marshmallows. Now grease your hands GENEROUSLY (palms, backs, and in between fingers), then heavily grease the counter you will be using and dump the bowl of marshmallow/sugar mixture in the middle.
Start kneading like you would bread dough. WARNING, this stuff is sticky at this stage! Add the rest of the powdered sugar and knead some more. Re-grease your hands and counter when the fondant starts sticking. If the mix is tearing easily, it is to dry, so add water (about 1/2 tablespoon at a time and then knead it in). It takes about 8 minutes to get a firm smooth elastic ball so that will stretch without tearing.
It is best to let the fondant sit, double wrapped, overnight, but you can use it right away if there are no tiny bits of dry powdered sugar. If you do see powdered sugar balls, you will need to knead and maybe add a few more drops of water.
Prepare the fondant icing for storing by coating it with a good layer of Crisco shortening, wrap in Saran wrap and then put it in a Ziploc bag. Squeeze out as much air as possible.
The fondant will hold very well in the refrigerator for weeks. If you want to dye it in advance, store the different colors in separate bags.
Approximate cost/serving: I buy my powdered sugar in 4lb bags at Sam’s Club. I bought my marshmallows around Thanksgiving because they were on sale then. The fondant only cost me about $3 to make. If you’re curious about the whole gingerbread house, that cost us about $25, pretty cheap for a day of entertainment for the whole family!
Vegetarian/Gluten Free: The fondant is gluten free but marshmallows contain gelatin so are not vegetarian. You can get vegetarian ones, but I have not tried them in fondant.

As a LOTR fan, I am incredibly impressed, as this is awesome in every sense of the word! Kudos for putting in the time to make this, as the final result came out great.
I am so impressed! My daughter in Berkeley is a LOTR fan (like avid, avid, avid), and she would love this recipe! I have to pass it on:) Thanks for the geeky inspiration:)
congrats. these are adorable!