 I have a confession to make. I had never made caramel until this past week. Yep, I’ve been cooking for years and years, and somehow had never made my own caramel. Partly because I don’t have a huge sweet tooth, and partly because I found the concept a little intimidating.
But I had a great idea for caramel dipped pear place-card holders, and decided it was time to give homemade caramel from scratch a try. I was surprised to find it was actually really easy.
I tried a few different versions and decided the one below is the easiest, cheapest, and tastes great!
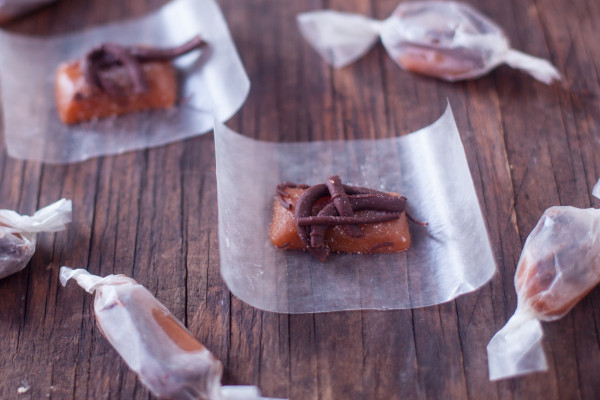
Rather than dipping each individual caramel in chocolate (Hello! Pregnant, exhausted, overwhelmed mama of a toddler with no time to spare here!), I made these ridiculously easy by just squiggling melted chocolate over the entire pan of caramels. Seriously, the easiest chocolate caramels EVER!
Of course, these are by no means healthy (54 calories per caramel!) but they’re definitely cheaper than buying fancy chocolate covered caramels. In fact, I made 10 dozen pieces in only an hour of active kitchen time, for under $4! I like to package 10 wrapped caramels together for an edible gift, so that’s gifts for 12 people, at just 33 cents a person! Buy some cellophane treat bags and pretty Christmas ribbon, and you’ve got some really affordable, cute, edible gifts.
As far as the chocolate goes, I made these with chocolate chips because that’s what I had left in my cupboard. But you could use a really good dark chocolate for even richer flavor.
Now, let’s talk about the key to perfect caramel. Your most fool proof method to making perfect caramels is to use a candy thermometer. I have one from Everyday Living that my mom gave me (that I never used until this week!). I really liked that it not only lists all the different temperatures for candy making and deep frying on the cover, but also has each stage listed next to its corresponding temperature on the thermometer itself. Perfect for a newbie like me. This stainless steel candy thermometer is currently the most popular one on Amazon, and has great reviews (and costs less!) so you might want to give it a try.

If you don’t have a candy thermometer, but still want to try making caramels, it is doable. The trick is to use the ice water bath test. Start by mixing your caramel ingredients in a pot over medium heat. You’ll need to keep an eye and stir it every 30 seconds or so for 15-20 minutes, until it starts to bubble. Then you need to stir it constantly!
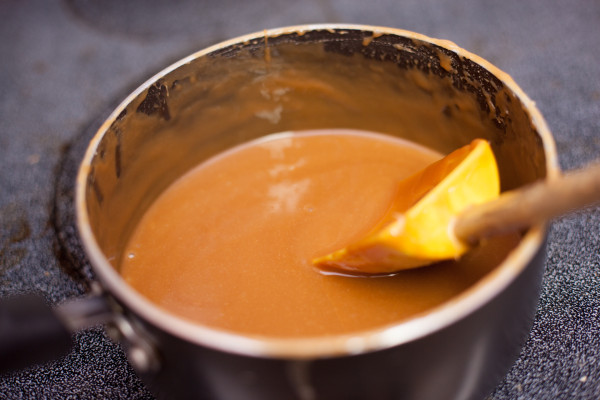
Once it starts to turn a pretty golden brown shade you’re getting caramel. This photo has the pot removed from the heat, so it’s not bubbling up. Oh yeah, that’s a good reminder. Make sure you have a few inches of room in your pot when you start or you will end up with a seriously scary cauldron of doom boiling all over the place!
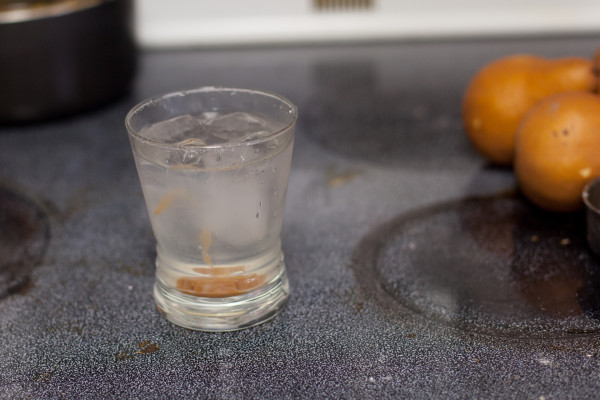
When you think the caramel might be ready (judging by its color), drizzle a little into a glass of ice water.
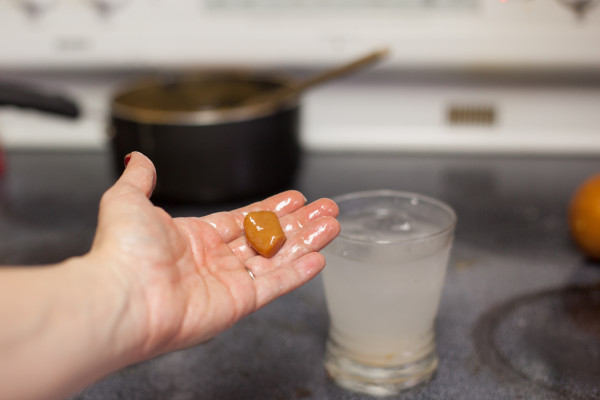
After about 30 seconds, when its cooled completely, pull it out and roll it around in your hands. It should be malleable, but firm enough to keep its shape. That’s called the firm ball stage, and it’s exactly what you want. If your caramel pulls apart into liquidy threads in the ice water, it still needs to cook longer and get hotter. If it gets really firm and hard, you cooked it too long. You can’t go back from overcooking, but you can always heat it more!

Once your caramel is made, you are ready to pour it into your dish. I used a platter about 6″ x 12″, and an inch deep. I discovered that lining the platter with foil and then buttering it was the easiest method for removing the caramel once it firmed up. Make sure it’s really well buttered so you aren’t left with pieces of foil stuck to your caramel!
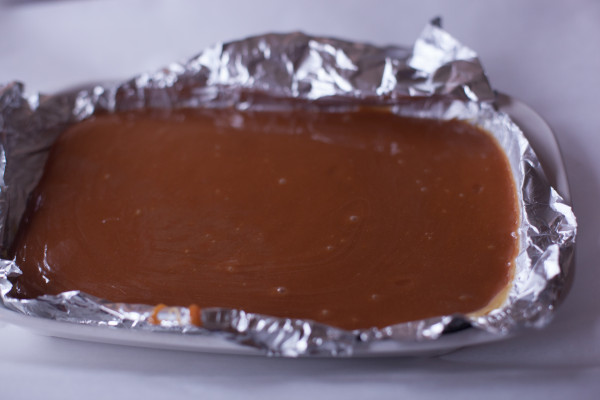
Next you need to let the caramel cool and firm up. For me, this just took half an hour sitting out on the front porch railing. You can also let it sit overnight if you want to break this up into two days, a great way to get it done during baby’s (or grandbaby’s) nap times.
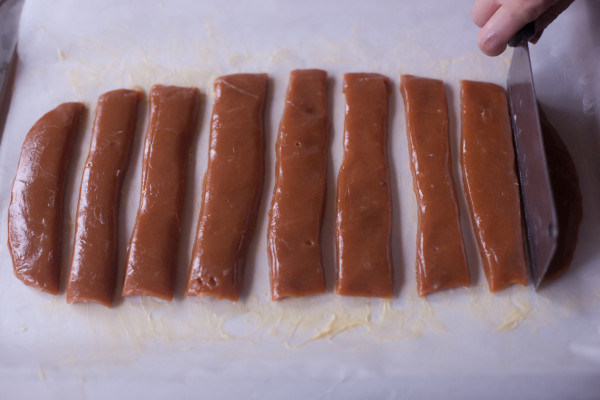
Once firm, I dumped the caramel sheet out onto a cookie sheet lined with buttered parchment. Then I used a big knife (I like a cleaver for this if you have one) to cut it into strips about one inch wide. You want to cut your caramel by pressing down with the knife, not a slicing motion.
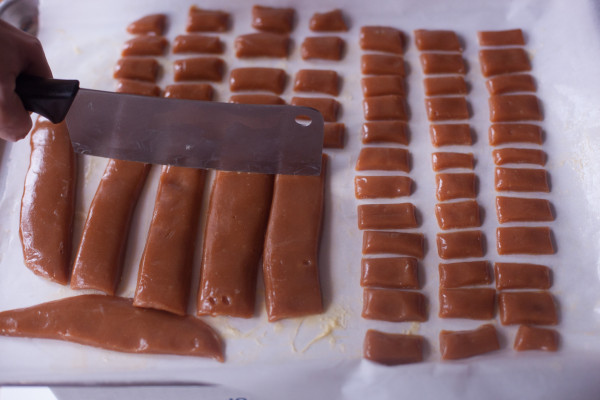
Next, cut each strip into smaller pieces. With the cleaver, I could do 3-4 strips at a time.
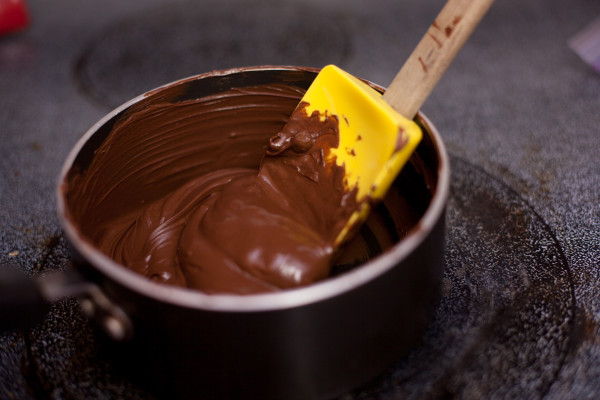
Once your caramels are bite sized, it’s time to melt your chocolate. I did mine on the stove, just stirring constantly and removing the pot from the heat once they were half melted and stirring to melt the rest. You can also use the microwave in 30 second increments.
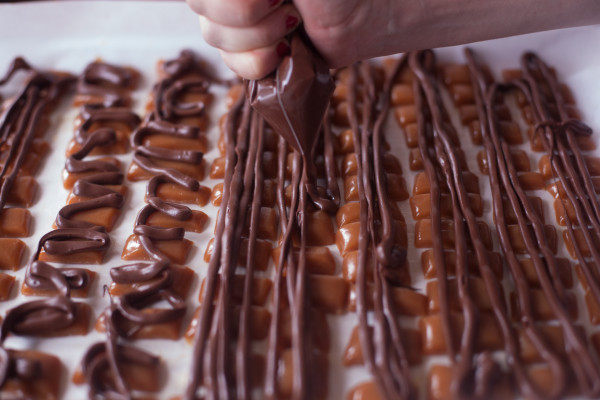
Now the fun shortcut for busy moms and grandmas. Scoop the melted chocolate into a zip top plastic bag, and snip a corner off. The smaller your hole for piping the chocolate, the prettier it will be.
I went for speed.
We had 10 minutes until Corban and I had to be out the door, so I snipped a big hole and went to town!
This is a fun part to let kids help with, as the chocolate is cool enough it won’t burn them, and they can squirt it in whatever kind of squiggles, zig zags, or lines they want.

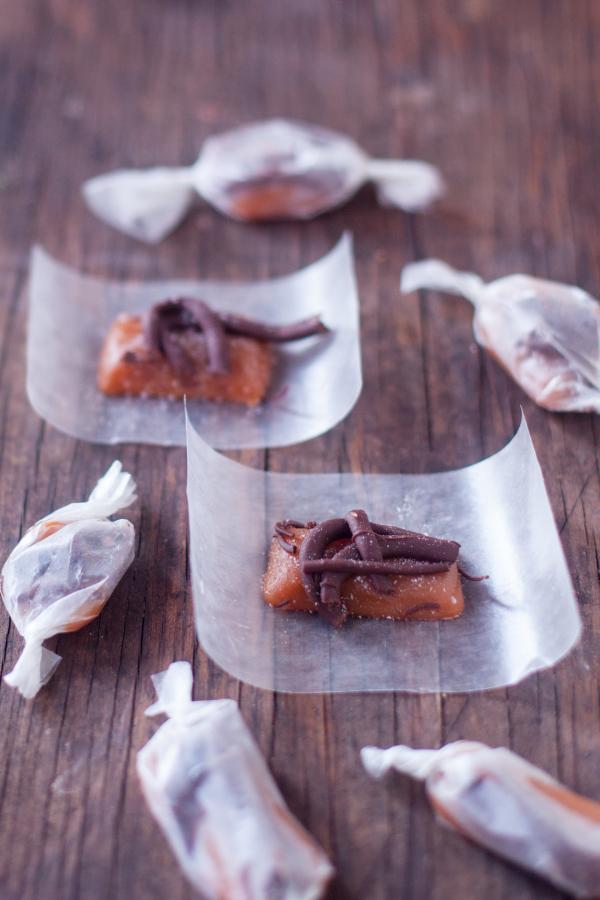
Now comes the salt. I used a Himalyan pink salt that I had in a salt grinder. You can sprinkle on coarse sea salt if you want more visible salt crystals. Just make sure to do it right after you get your chocolate on or it will get too hard for the salt to stick. Let the chocolate harden. For me, it was five minutes on the front porch. Then you can use your cleaver or your fingers to separate the caramels, breaking up the chocolate.
These wonderfully easy homemade caramels have me covered for four different Christmas parties this week, including a cookie exchange. Good thing because I’m definitely starting feel that I’m in my third trimester. Baby girl is 33 weeks and the size of a pineapple!

Have you ever made caramels before? Any other tips for those of us who are new at it?
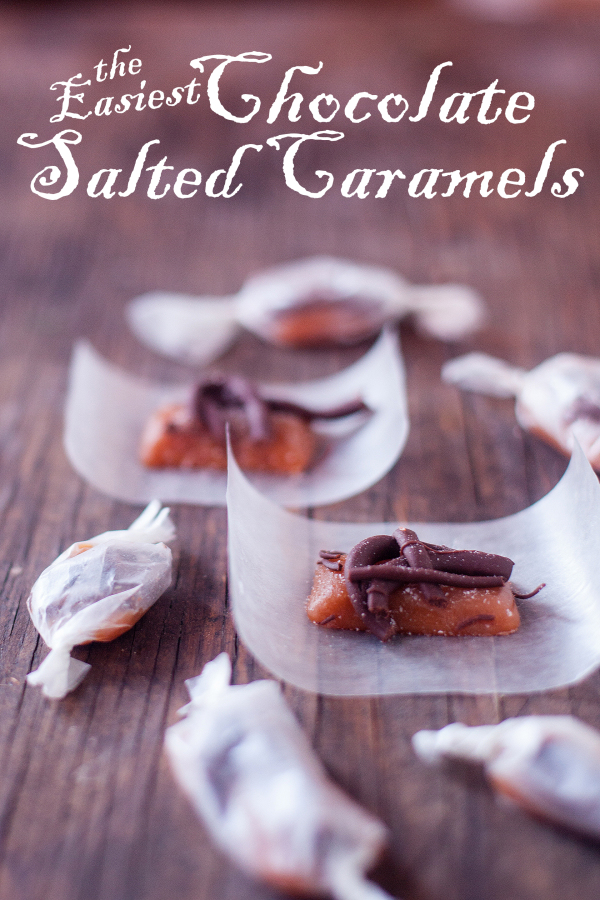
The Easiest Chocolate Salted Caramels Recipe (Edible Gift)

These chocolate salted caramels from scratch are easy, cheap, and take less than an hour of active kitchen time!
Ingredients
- 2 tablespoons butter, divided
- 2 cups granulated sugar
- 14 ounce (1 can) of sweetened condensed milk
- 1 cup light corn syrup
- 2 cups chocolate chips
- coarse salt
Instructions
- Cover a platter or small baking sheet in foil and butter it well with 1 tablespoon of the butter.
- Mix the sugar, sweetened condensed milk, and corn syrup in a pot on the stove. Make sure you have a few inches of room in the pot for when it starts to bubble.
- Heat the pot on medium for 20-30 minutes, stirring with a sturdy spatula every thirty seconds or so.
- Once everything starts to bubble, stir constantly so the caramel doesn't burn.
- You can use a candy thermometer to check when your caramel reaches firm ball stage (245 degrees F). If you don't have one, drizzle some caramel into a bowl or glass of ice water. Once it's completely cool (about 30 seconds), pull the caramel out and roll it between your fingers. It should form a nice ball. If the caramel separates in the water, it's not hot enough yet.
- Pour the caramel into your buttered dish and let sit until firm and completely cooled.
- Line a big baking sheet with parchment paper, and use the remaining tablespoon of butter to grease the paper well.
- Place your slab of caramel onto the sheet and cut it into 120 pieces.
- Put the chocolate chips in a small pot and heat them on medium heat. Once they start to melt, stir with a spatula until completely melted and smooth.
- Scoop melted chocolate into a zip top plastic bag, snip a tiny corner off, and drizzle chocolate all over the sheet of caramels.
- Sprinkle salt onto the chocolate covered caramels, then let them sit until the chocolate has hardened.
Notes
Approximate cost/serving: This came out to about 3 cents a caramel.
Vegetarian/gluten free: Although there is no meat or eggs, it does contain dairy so is not vegan. This recipe is gluten free.
Nutrition Information:
Yield:
120Serving Size:
120 ServingsAmount Per Serving: Calories: 54Saturated Fat: 0.87gCholesterol: 1.17mgSodium: 47.67mgCarbohydrates: 14.81gSugar: 7.08gProtein: 0.6g

I also made caramels for the first time this Xmas for gifts. 🙂 I found a recipe for making them in the microwave, which I preferred because the idea of doing it on a stove top seems really scary! O_o I had to do the ice water test, since I still don’t have a sugar thermometer.
I wish I would have thought of drizzling chocolate! I was going to dip mine, but my toddler just didn’t give me the time. 🙂 I’ll definitely use this idea next time I attempt this. Thanks for sharing.
These caramels are a great Christmas treat idea. I never liked store-bought caramels but something tells me I’m going to love these sweets. I’m excited to give this recipe a try.